Skip to content

Garden, How to Guides
How to Build a Pergola: A Step by Step DIY Guide
A pergola is a fantastic way to add structure, shade, and style to your garden. Whether you want to create a seating area, support climbing plants, or define a pathway, this step‑by‑step guide will show you how to build a pergola that is strong, and long lasting using quality timber and fittings.
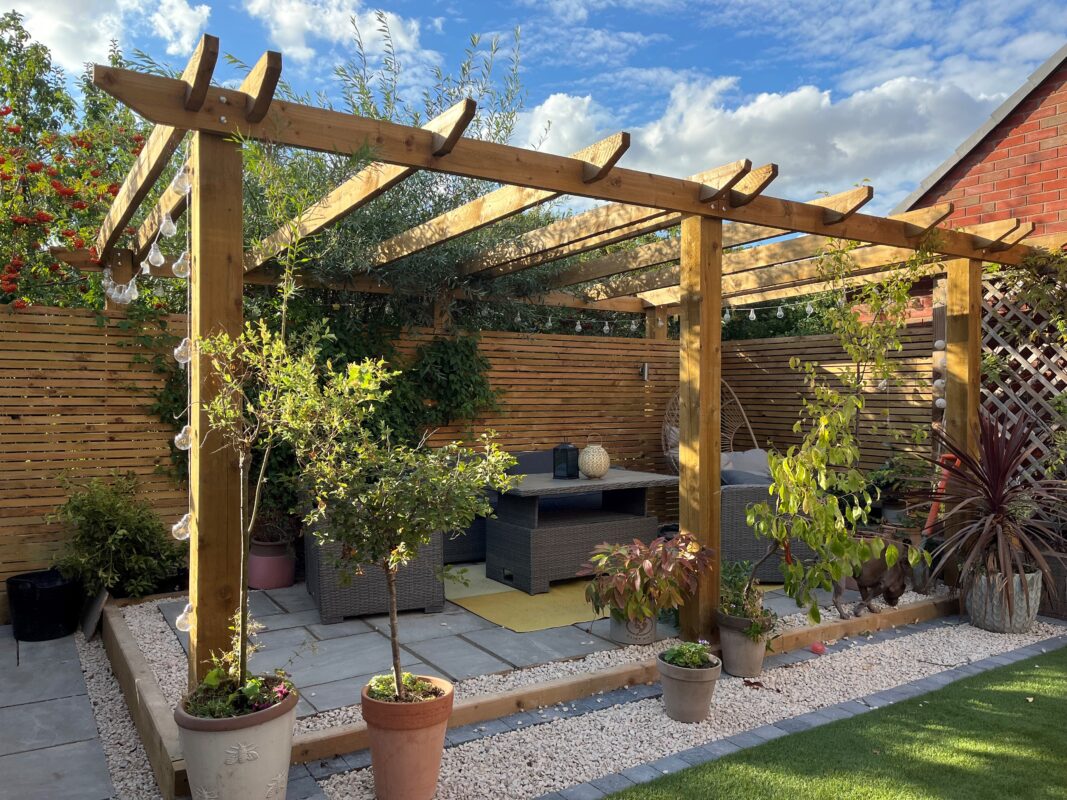
What You’ll Need (Materials List)
Here is a list of all the essential items you will need to build a basic timber pergola. Later we will touch on some optional extras you can add to make your garden pergola really stand out.
- Pressure treated timber posts
- Pressure treated beams and rafters
- Post mix (if setting posts into the ground)
- Metal bolt down post support with bolts (if sitting your posts on a concrete/patio area)
- Exterior screws
Pro Tip: If you are going to set your posts into the ground be sure to choose UC4 treated timber, as this is designed to provide longer service life in direct ground contact.
How to Build a Pergola
Step 1: Plan Your Pergola
Before you start building there are a few things you need to consider:
How big will your pergola be?
The great thing about building a DIY pergola is that you can make it fit any space. Some things to consider when choosing a size are; the space you have in the garden, typical lengths of timber that you can buy, so you are not having a lot of waste material (they are usually sold in standard lengths with 600mm increments) and what you plan on using the pergola for (will it have a hot tub or seating area underneath?). A typical pergola is square in shape with four posts, but you can make any shape you like by adding more posts and getting creative with your beams and rafters.
What size posts should I use?
The post size will be somewhat determined by the size of pergola you plan on building but aesthetics will also play a role in your choice. We recommend going no smaller than 100mm x 100mm, to ensure that your structure has enough strength. If you want to cover a bigger area with your pergola or like a more heavy duty look you can use 150mm x 150mm or even 200mm x 200mm posts to make them more of a feature. You can use a notched post to make installing the beams easier but it is not essential.
How tall should I go?
A typical pergola height in the UK is between 2m and 2.4m, this will give you plenty of head room whilst not generally requiring any planning permission (always check your local rules to be safe). Remember if you are going to be setting your posts into the ground you need to allow for 600mm – 750mm extra above your desired finish height when selecting the length of your posts.
Step 2: Dig the Post Holes or Install Bolt Downs
Mark each post position.
Start by measuring out where your posts will sit, and measure corner to corner to ensure that your pergola will be square. Mark each position with some spray marker. Note that you will need to overhang your beams and rafters by around 300mm – 450mm depending on the look you desire, so ensure you bring your posts in adequately to allow for this.
Option 1: Dig the holes.
Using a spade or pair of double shovels dig a hole at least 600mm deep, for bigger posts consider going 750mm or more to give you the sturdiest structure possible. You can add a small layer of gravel into the bottom of the hole to help with water drainage.
Option 2: Install the bolt downs.
Place the bolt down in the centre of where you have marked the post position and mark where the four holes need to be drilled. Using an appropriate drill bit for the material you are screwing to, drill out the four holes. You can now attach the bolt downs to the floor using screws or bolts as necessary, for example thunderscrews or anchor bolts, making sure they are well secured.
Step 3: Install the Pergola Posts
Option 1: Concrete the posts in the hole.
Sit your posts into the hole, using a spirit level to check they are perfectly vertical. Add water to the hole then fill with instant post mix, check the label on your bags as each brand will have different water quantity requirements. Our recommendation is you use two bags of instant post mix per hole. Post mix sets very quickly, you won’t have long to make adjustments so make sure the posts are still level.
Pro Tip: screw some spare bits of wood onto the posts to use as braces to keep the posts vertical while the post mix sets.
Option 2: Secure the bolt downs.
Sit the posts into the bolt downs, use a spirit level to check they are perfectly vertical. Use a spanner or socket set to tighten the bolts until it has a secure hold on the post. For extra security you can add some screws.

Step 4: Fix the Main Beams
Shape the end of the beams and rafters.
Shaping the ends is not an essential step but one which will add character to your pergola. You can go simple and cut a basic 45 degree angle using a handsaw or if you have a jigsaw you can get creative with a curved, S shape or anything you like really! Pre-shaped beams and rafters are available in set sizes.
Option 1: Fit the beams into the notched posts.
If you are using notched pergola posts then you can slot your horizontal beams into these notches and secure them with an exterior wood screw. Using your spirit level again, check to make sure the beams are level. Remember to leave an overhang on each end.
Option 2: Screw beams onto flat posts.
When using standard posts you will screw the horizontal beams onto the face of the posts. You can do this using either exterior screws or coach bolts. Be sure to use a spirit level to get the beams perfectly level before screwing them on. Remember to leave an overhang on each end.
Fun Fact! Did you know that pergolas date all the way back to ancient Rome and Greece.
Step 5: Add the Rafters
Space your rafters evenly.
There is no hard and fast rule for how far apart you need to space the rafters on a pergola, its mostly down to personal preference and what looks best. Typically you’d be looking at around 300mm to 450mm spacings but as long as you make sure all of the gaps are equal you can space them as far or close as you please.
Screw the rafters down.
Once you have your spaces sorted it is as simple as screwing through the top of the rafters straight down into your beams. Using a coated hex head timber screw is ideal for this.
Step 6: Extras and Finishing Touches
Now you’ve learnt how to build a pergola and your basic structure is finished you can look at adding some finishing touches to enhance your pergola. Some things you may consider are:
- Fitting trellis panels to the sides to add some privacy.
- Add climbing plants like Jasmine, Roses or Wisteria.
- Apply timber stain or paint for added protection from the British elements and to add a splash of colour.
- Hanging outdoor lights.
- Fit clear roof sheets to make use of your outdoor space in all weather.

Why Build Your Pergola With DMF?
Building your own pergola is rewarding, and David Musson Fencing makes the process simpler from start to finish. We supply materials you can trust, along with clear advice whenever you need it. From choosing the right timber to getting the dimensions just right, our experienced team is here to help you build with confidence. With quality products, practical support, and no fuss, you’ll have everything you need to create a pergola you can be proud of.